I love our church!!! T-Shirts and jeans are the outfits of choice most of the time, and since that's the case they give out or sell T-Shirts for all kinds of occasions. And they're very inexpensive. Most of the time we have to pay $5 per T-Shirt and that's any size, so we have a LOT of church T-Shirts. Inevitably when wearing a T-Shirt to church you end up being twins, triplets, quads...you get the point. And they're unisex and I like to feminize mine. So that's what I did...on T-Shirt #1
.JPG) |
| T-Shirt #1 |
Another thing I love is the music we play. It is very contemporary and loud...apologetically!!! One of my favorite songs is "Manifesto" by The City Harmonic. We had a chance to see them at a 4th of July celebration in our city and they had a T-Shirt that had the lyrics to that song...score!!! Problem was...their largest size was much to small for me, but I wanted the shirt sooo bad! So I bought it with grand plans to expand the shirt to fit me...T-Shirt #2!
.JPG) |
| T-Shirt #2 |
So back to T-Shirt #1...I decided I wanted to frilly up the sleeves. So I chopped off the edges and ruffled them up by zigzag stitching the edges.


Then I wanted to open up the neckline and add something girlish to it. It's not the easiest thing to open up a neckline without cutting too much or letting it stretch too much. To keep it from stretching I added a binding I made of left over t-shirt material from another project.
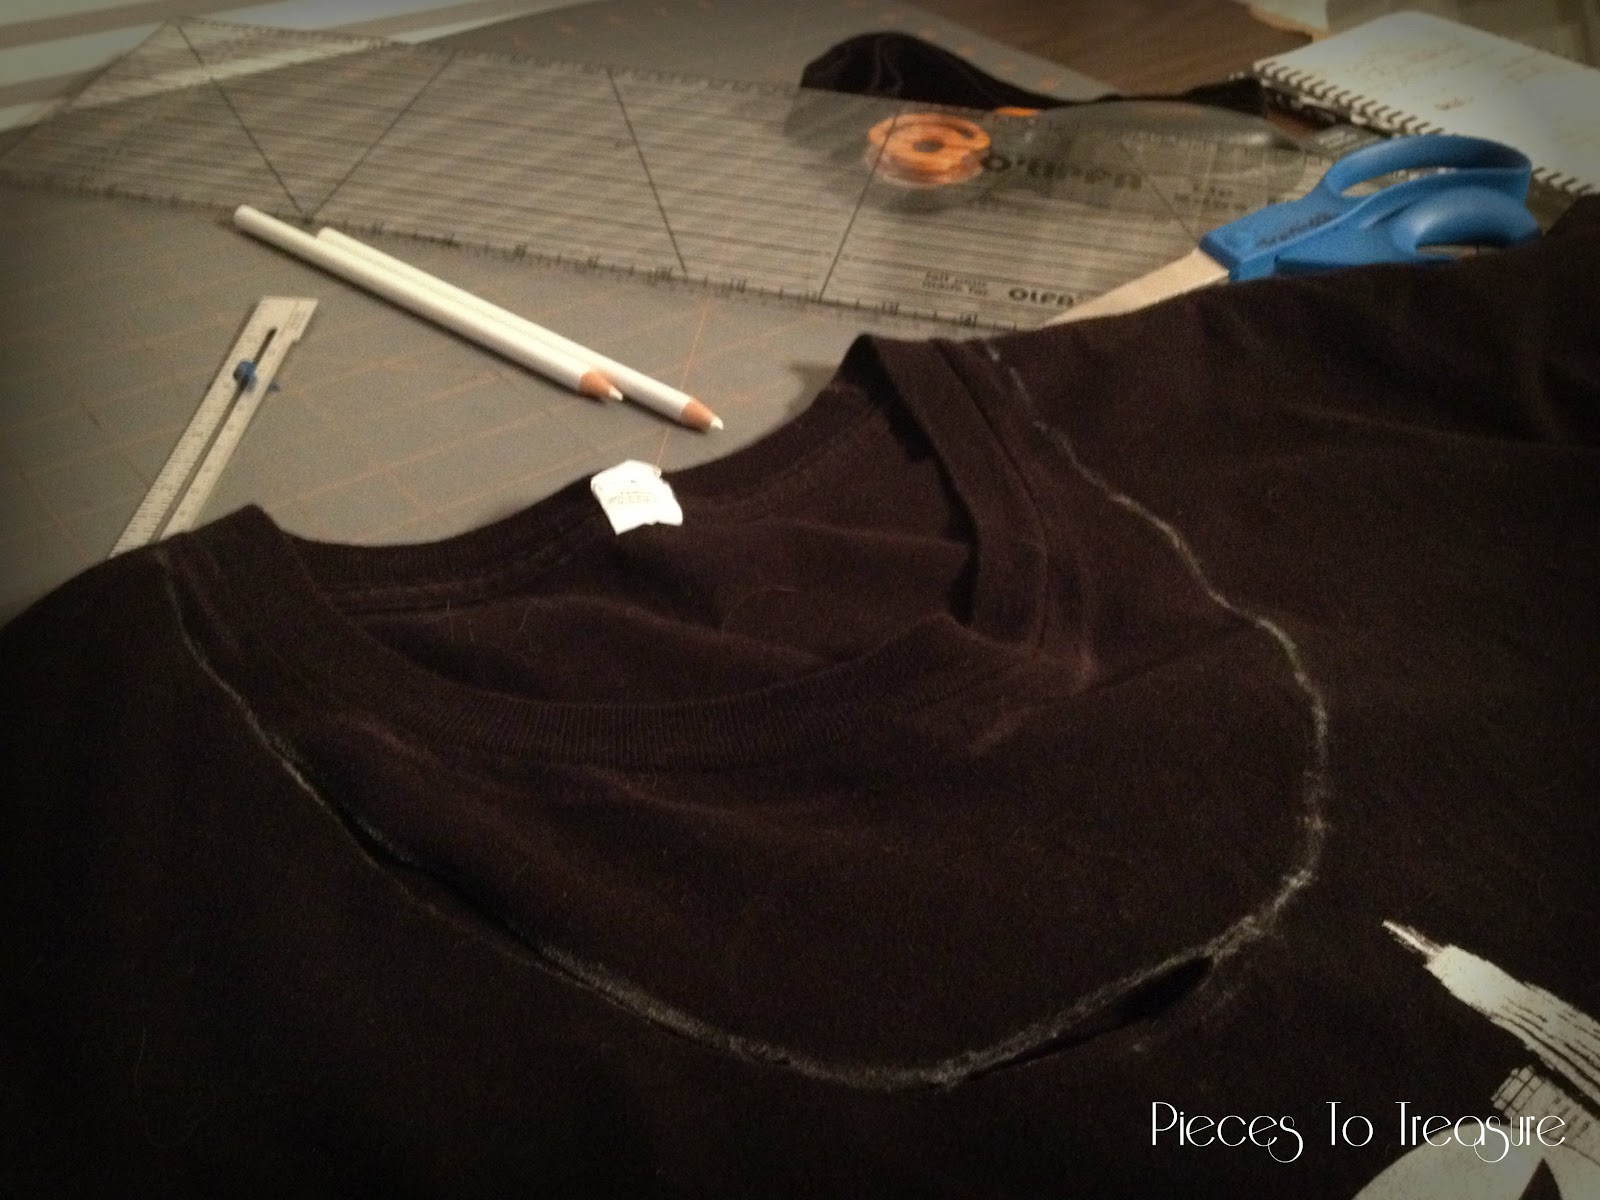


I then top stitched it down to keep it from rolling to the front of the shirt. That's the way it stayed for a couple of weeks while I decided what Pinterest-y way I wanted to dress up the front.
I decided to use some black tulle and cut out a bunch of circles. I wanted 3 circles for every little flower or puff on the front of the shirt. I wasn't sure how many I needed, so I cut a lot. I folded the tulle over accordion-style a bit larger than the circle I was going to use as a template. Then I cut a bunch at one time.


Then I took 3 at a time and folded them up in thirds...kinda...I didn't really want them each perfect. I wanted them different and not cookie cutter shape looking. Then I hand stitched the ends of the piece and then stitched it to the edge of the neckline.


I ended up with 13 poofs on one side and 13 on the other side. I didn't do the whole neckline because I didn't want it to be scratchy on my neck and honestly it didn't need to go all the way around anyway.


Now my T-Shirt will be a one-of-a-kind and very much ME!
Then there's T-Shirt #2.
This is honestly one of the softest, most comfortable t-shirts I've ever owned and so to enlarge it I had to be careful what kind of fabric I put with it. I've been working with a screen printing company closely for our PTSA so I decided to see if I could order another shirt the exact same brand as this t-shirt. Thankfully he was able to get one, and in the same size as the one I bought...less altering!!!
To start with I measured the t-shirt I wanted to alter with a t-shirt that I knew fit me the way I liked to determine how much I really needed to add. Then I took the blank t-shirt, marked and cut the sides and arm holes at the seams using the measurements from the other t-shirt.


Next I had to remove the seam from the original t-shirt. I started by ripping it out, but soon decided that would take me WAYYYY too long!!! So I just cut it out...very carefully!!! I'm enlarging this thing, I don't need to cut out extra! That would be very foolish. So I cut the seam slowly right along the stitch line.


Once it was opened up I matched the extension right sides together with the original t-shirt. It wasn't just as easy as lay it down and it matches up...when is it ever! I had to ease things in especially in the chest and underarm area. AND...the edge of the sleeves didn't match up. Ok, did I tell you I've never enlarged a t-shirt before? This is learning as you go at it's finest. I'll explain how I fixed that in a minute. Once I matched up the edge...one at a time mind you...I stitched them carefully using about a 1/2 inch seam.

I repeated that with all 4 seams then used a zigzag stitch to "serge" together the seam allowance since I don't own a serger!!! Then I cut off the excess sleeve and the cuff of the original sleeve. I used the same zigzag method to finish off the sleeves that I did with the black t-shirt.
The last thing I wanted to change was the neckline (again...I am not a fan of the tight t-shirt necklines that come standard in unisex t's). I cut off the collar right along the stitching just to get that cuff piece off. I stitched it with a straight stitch about a 1/3 inch in to keep it from stretching too much. Then I added a white piece of tulle and a piece of blue t-shirt fabric about an inch wide each and left the edges raw. I stitched them together straight down the middle and then attached them to the raw neckline of the t-shirt about 1/2 inch in from the edge.


Now I can wear my T-Shirt I love without it being too small!!! It worked out great, not perfect, but good enough for me!

I can't wait to find some other ideas for T-Shirts since I know I will end up with another 2 or 3 church shirts by the end of the year. Another reason I love Pinterest and blogging!!! It's such a great way to get ideas and turn my Pieces into Treasures!!!
UPDATE:
I'm wearing the T-Shirt #2 today and had to change the collar. I'd added the tulle and it was horribly itchy...completely driving me crazy (NO COMMENTS NEEDED ON THAT STATEMENT!). So I ripped off the previous collar gently and grabbed my extra shirt leftovers to make something new...and SOFT! I cut 4 strips out of the body of the extra about 2" wide, stitched them together to make one long strip then basted them down the middle. Then I gathered them all up tight.

To prep the shirt I zigzagged around the edge of the t-shirt at the collar before adding the ruffle.

I then stretched the gathered strips out to fit around the t-shirt collar, spread the gathers out evenly and pinned it down. Then I zigzagged stitched through the center of the strip attaching it to the shirt. Using the zigzag vs. a straight stitch I kept the stretchability of the neck of the shirt. I was lacking that with the previous alteration and since I had to change it anyway...can't have an itchy neck...I went with zigzag over the straight stitch. Trust me, it's much more comfortable!!!


Jennifer
Blogs I'm Linking Up With:
Sunday
DIY Showoff: Project
Parade
Flamingo Toes: Think Pink
I {heart} Nap Time: Sundae Scoop
Nifty Thrifty Sunday
Twigg Studios Sunday Showoff
Under the Table and Dreaming: Sunday Showcase Party
Cherished Treasure: Sunday Blog Love
My 1929 Charmer: Sunday's Best
Flamingo Toes: Think Pink
I {heart} Nap Time: Sundae Scoop
Nifty Thrifty Sunday
Twigg Studios Sunday Showoff
Under the Table and Dreaming: Sunday Showcase Party
Cherished Treasure: Sunday Blog Love
My 1929 Charmer: Sunday's Best
Monday
Tuesday
Wednesday
Thursday
Friday
Saturday
Jennifer,
ReplyDeleteI like what you did with the T-Shirts adding some frilliness to them and making them OOAK. Thanks for stopping by my blog and leaving a sweet comment on my frosted vase.
I love your T-shirt recycle! Great job! Thanks for sharing at the Pomp Party! Pinning to our Pomp Party board!
ReplyDeleteSo cool Jennifer!! Way to go! Love the ruffles.
ReplyDeleteThanks so much for sharing this at The DIY Dreamer... From Dream To Reality!
Wow, you really know how to transform a shirt!
ReplyDeleteWow nice. Thanks for sharing this.Now I got different ideas to do some changes with my blank t shirts
ReplyDelete