I love our church!!! T-Shirts and jeans are the outfits of choice most of the time, and since that's the case they give out or sell T-Shirts for all kinds of occasions. And they're very inexpensive. Most of the time we have to pay $5 per T-Shirt and that's any size, so we have a LOT of church T-Shirts. Inevitably when wearing a T-Shirt to church you end up being twins, triplets, quads...you get the point. And they're unisex and I like to feminize mine. So that's what I did...on T-Shirt #1
.JPG) |
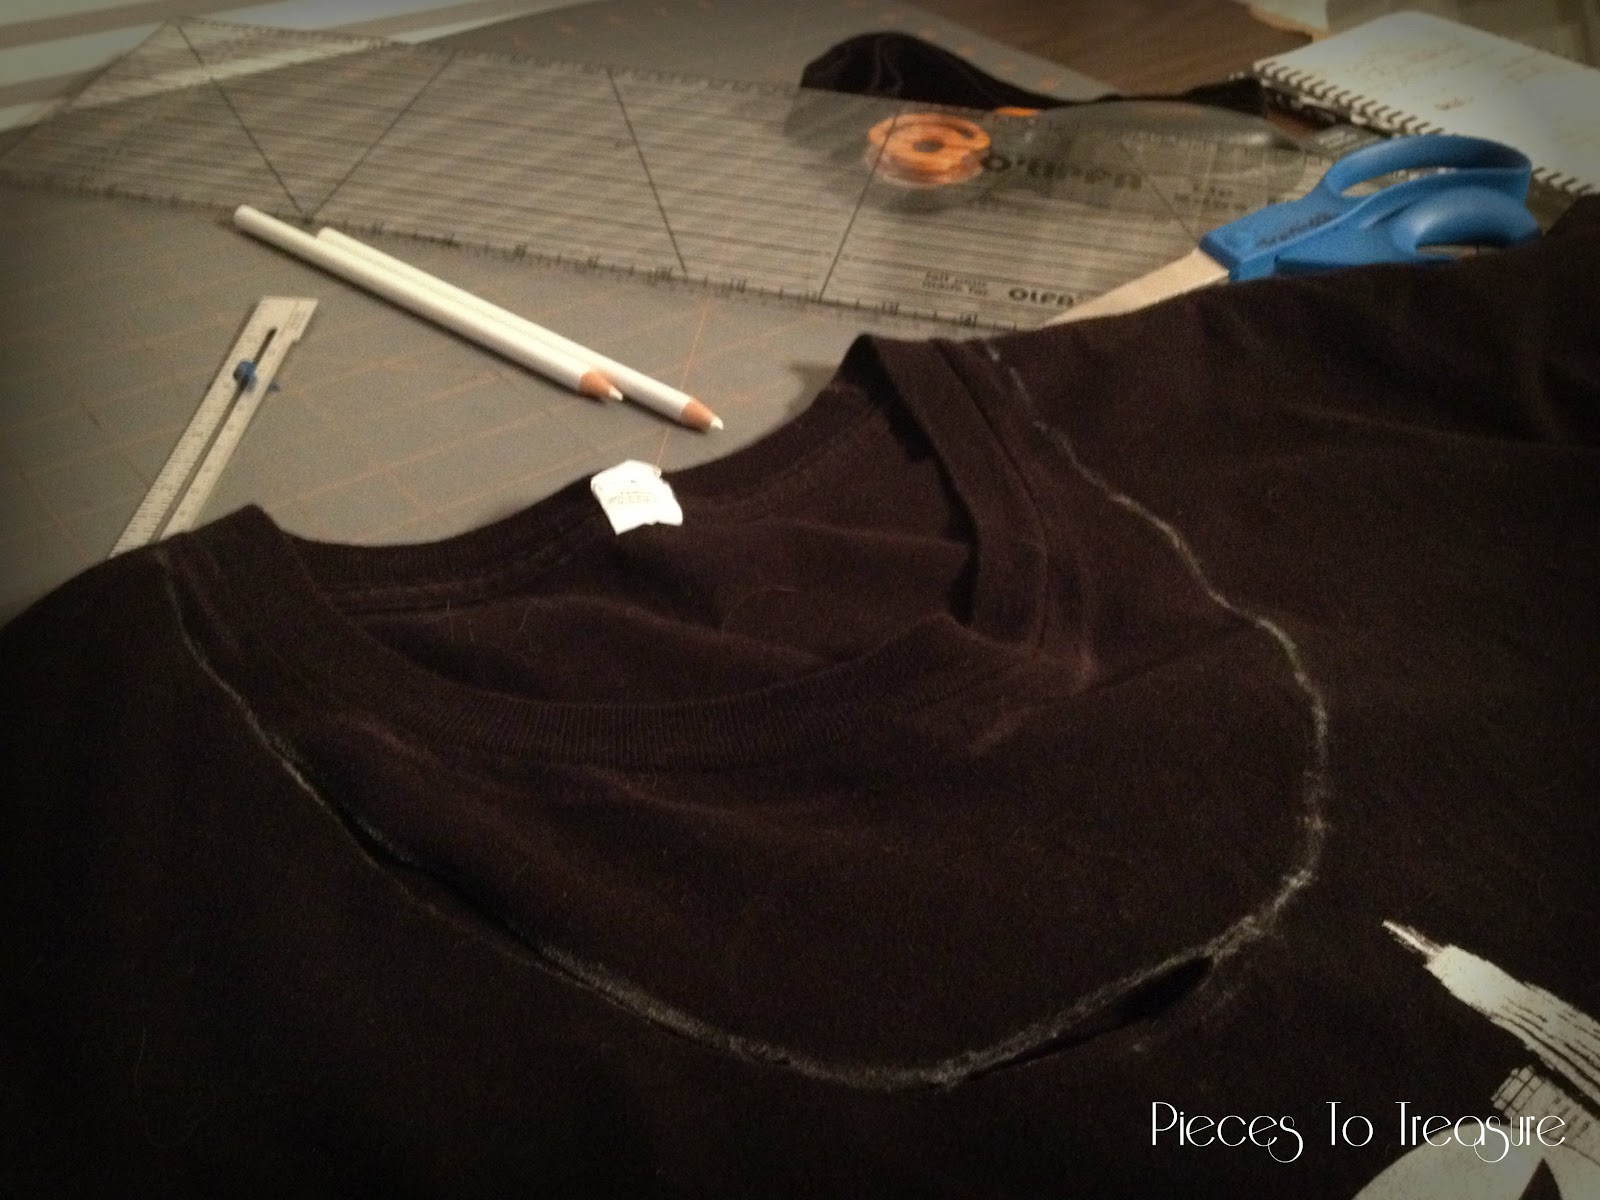
| T-Shirt #1 |
Another thing I love is the music we play. It is very contemporary and loud...apologetically!!! One of my favorite songs is "Manifesto" by The City Harmonic. We had a chance to see them at a 4th of July celebration in our city and they had a T-Shirt that had the lyrics to that song...score!!! Problem was...their largest size was much to small for me, but I wanted the shirt sooo bad! So I bought it with grand plans to expand the shirt to fit me...T-Shirt #2!
.JPG) |
| T-Shirt #2 |
So back to T-Shirt #1...I decided I wanted to frilly up the sleeves. So I chopped off the edges and ruffled them up by zigzag stitching the edges.
Then I wanted to open up the neckline and add something girlish to it. It's not the easiest thing to open up a neckline without cutting too much or letting it stretch too much. To keep it from stretching I added a binding I made of left over t-shirt material from another project.
I then top stitched it down to keep it from rolling to the front of the shirt. That's the way it stayed for a couple of weeks while I decided what Pinterest-y way I wanted to dress up the front.
I decided to use some black tulle and cut out a bunch of circles. I wanted 3 circles for every little flower or puff on the front of the shirt. I wasn't sure how many I needed, so I cut a lot. I folded the tulle over accordion-style a bit larger than the circle I was going to use as a template. Then I cut a bunch at one time.
Then I took 3 at a time and folded them up in thirds...kinda...I didn't really want them each perfect. I wanted them different and not cookie cutter shape looking. Then I hand stitched the ends of the piece and then stitched it to the edge of the neckline.
I ended up with 13 poofs on one side and 13 on the other side. I didn't do the whole neckline because I didn't want it to be scratchy on my neck and honestly it didn't need to go all the way around anyway.
Now my T-Shirt will be a one-of-a-kind and very much ME!
Then there's T-Shirt #2.
This is honestly one of the softest, most comfortable t-shirts I've ever owned and so to enlarge it I had to be careful what kind of fabric I put with it. I've been working with a screen printing company closely for our PTSA so I decided to see if I could order another shirt the exact same brand as this t-shirt. Thankfully he was able to get one, and in the same size as the one I bought...less altering!!!
To start with I measured the t-shirt I wanted to alter with a t-shirt that I knew fit me the way I liked to determine how much I really needed to add. Then I took the blank t-shirt, marked and cut the sides and arm holes at the seams using the measurements from the other t-shirt.
Next I had to remove the seam from the original t-shirt. I started by ripping it out, but soon decided that would take me WAYYYY too long!!! So I just cut it out...very carefully!!! I'm enlarging this thing, I don't need to cut out extra! That would be very foolish. So I cut the seam slowly right along the stitch line.
Once it was opened up I matched the extension right sides together with the original t-shirt. It wasn't just as easy as lay it down and it matches up...when is it ever! I had to ease things in especially in the chest and underarm area. AND...the edge of the sleeves didn't match up. Ok, did I tell you I've never enlarged a t-shirt before? This is learning as you go at it's finest. I'll explain how I fixed that in a minute. Once I matched up the edge...one at a time mind you...I stitched them carefully using about a 1/2 inch seam.
I repeated that with all 4 seams then used a zigzag stitch to "serge" together the seam allowance since I don't own a serger!!! Then I cut off the excess sleeve and the cuff of the original sleeve. I used the same zigzag method to finish off the sleeves that I did with the black t-shirt.
The last thing I wanted to change was the neckline (again...I am not a fan of the tight t-shirt necklines that come standard in unisex t's). I cut off the collar right along the stitching just to get that cuff piece off. I stitched it with a straight stitch about a 1/3 inch in to keep it from stretching too much. Then I added a white piece of tulle and a piece of blue t-shirt fabric about an inch wide each and left the edges raw. I stitched them together straight down the middle and then attached them to the raw neckline of the t-shirt about 1/2 inch in from the edge.
Now I can wear my T-Shirt I love without it being too small!!! It worked out great, not perfect, but good enough for me!
I can't wait to find some other ideas for T-Shirts since I know I will end up with another 2 or 3 church shirts by the end of the year. Another reason I love Pinterest and blogging!!! It's such a great way to get ideas and turn my Pieces into Treasures!!!
UPDATE:
I'm wearing the T-Shirt #2 today and had to change the collar. I'd added the tulle and it was horribly itchy...completely driving me crazy (NO COMMENTS NEEDED ON THAT STATEMENT!). So I ripped off the previous collar gently and grabbed my extra shirt leftovers to make something new...and SOFT! I cut 4 strips out of the body of the extra about 2" wide, stitched them together to make one long strip then basted them down the middle. Then I gathered them all up tight.
To prep the shirt I zigzagged around the edge of the t-shirt at the collar before adding the ruffle.
I then stretched the gathered strips out to fit around the t-shirt collar, spread the gathers out evenly and pinned it down. Then I zigzagged stitched through the center of the strip attaching it to the shirt. Using the zigzag vs. a straight stitch I kept the stretchability of the neck of the shirt. I was lacking that with the previous alteration and since I had to change it anyway...can't have an itchy neck...I went with zigzag over the straight stitch. Trust me, it's much more comfortable!!!
Jennifer
Blogs I'm Linking Up With:
Sunday
Monday
Tuesday
Wednesday
Thursday
Friday
Saturday


.JPG)
.JPG)