Beware...I have a TON of pictures for this tutorial, and since it's my first major tutorial I can imagine I'll be quite clumsy at it. Just a heads up...so LET'S DO THIS!!!
Recently I saw a question from another Silhouette Cameo owner on how to do a double layered vinyl. I watched a video on how to put it together, but hadn't seen a tutorial done on how to make it in Studio. That's why I'm putting this together.

First things first...have a design you like. This is a bumper sticker I made for my car a while back. I wanted to replace it with glitter vinyl that I just purchased and take away a white oval I put behind it replacing it with an offset mat of white vinyl instead. Here's how:

To make a two layered vinyl line up easier start by making registration marks...that's a silhouette studios term and not sure it's the right one here, but since we are using studio I'm sure you'll all understand. I started here with basic circles. Almost any basic shape will work. You just want something that you can line up together.

Take the knife tool and cut the circles into pie pieces; two pieces for each color. (This method works for 3+ layers, but I've only done up to 3 layers.)

Fill in two pieces in each pie with the color of this layer of vinyl. It would also be good to group these at this point. I don't have an arrow for that since I didn't take that step, but it will help you later.
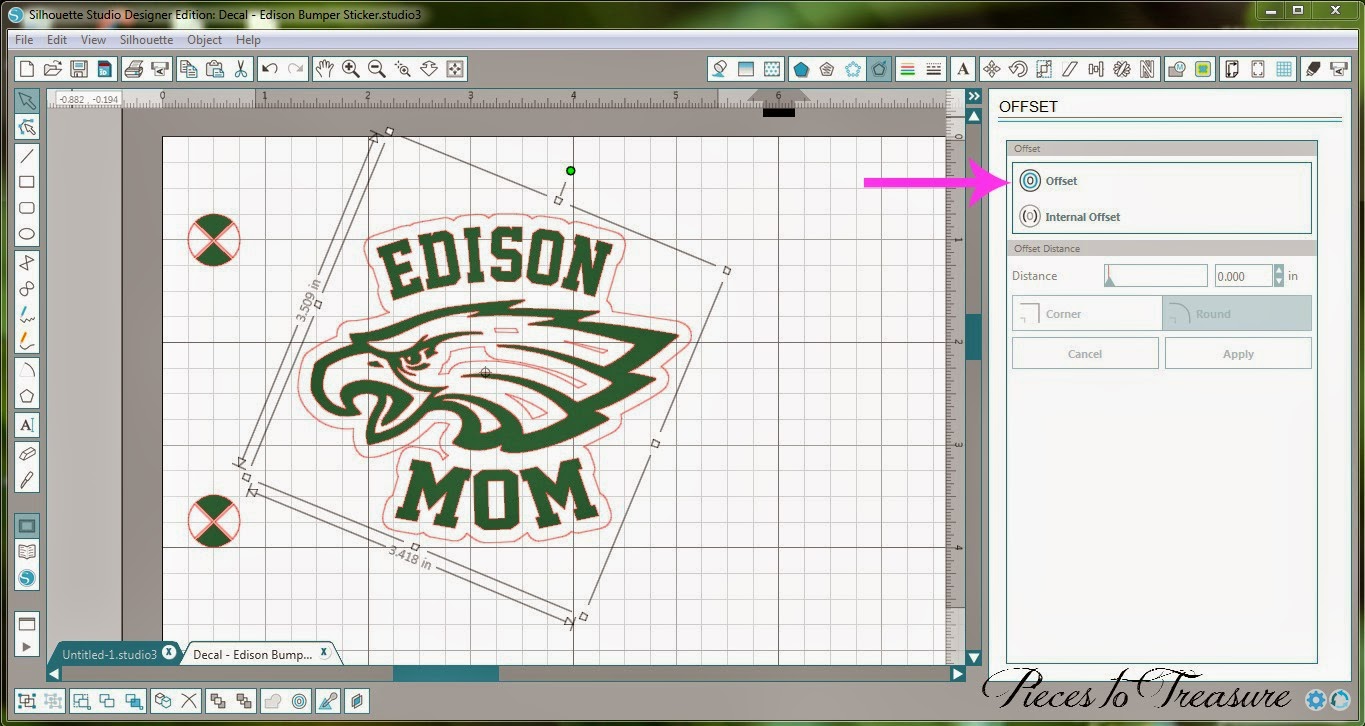
Select the main image and create an offset. Mine is .1 to .125...can't remember which...then left click on the offset image and release the compound path. Delete the small pieces inside the bird. Or, if you prefer to have the inner part of the white smaller than leave them and skip this part. I wanted a solid white background behind the eagle so I removed the small pieces.

Select the offset piece and fill it with a color. I prefer to fill my images with the color I plan to cut it in. It keeps me straight when I go to cut. I was cutting this in white so that's why I chose white as the fill.

Select the other 4 pieces of the pie and fill them with the same color as this layer of vinyl. Are you starting to see a pattern here? Also, group these together while you have them gathered up. If you don't know already it's the bottom left button. I'll point it out in a minute.

Now that the vinyl is all set up we have to make sure things don't move around on us accidentally. Grab the background image and the corresponding pieces of pie and Group those babies together. See, the group button is that one at the tip of the pink arrow! Told ya I'd show ya!!! (My Okie's coming out!)

Now do the same thing with the top layer. Grab the pie pieces and the image...make sure they do NOT move when you do this part...and group them together.

Once that's all done you should be able to grab one color and move all of that image away from the other image. If it doesn't then hit the little counter clockwise arrow at the top and try again!!! You need ALL of that color together!

Well, now I'm going to throw you for a loop. I changed the image! I decided I wanted something with a bit more flourish and femininity but I followed ALL the instructions I just gave you to get to this point. Now I always want to look at how my image might look on the car (or whatever else it may go on). I draw a box around it and fill it with a dark color, quite often black. I didn't point this button out but when I create the box and fill it in it will be the top image. I have to select the box and use the "send it to the back" box on the bottom. It's in the 4th box over from the left. Then I select my images in the box and remove the outline color. This way I see it almost just as it will be cut. See the purple and blue arrows for the buttons to make that change.

Now I know I like my image and don't have any changes to make. I change the line back to red so I can see the white image. For this particular cut the image with the registration marks is slightly wider than 12" so I turned the images so I can cut them both at the same time. It's not going to make a difference which direction they're facing on the cutting board...but this is NOT heat transfer vinyl...DO NOT MIRROR THE IMAGE!!! (that's just an fyi for the HTV folks!)

I cut the two pieces of vinyl out and lay them on the board making sure they're in the cut area of my images.

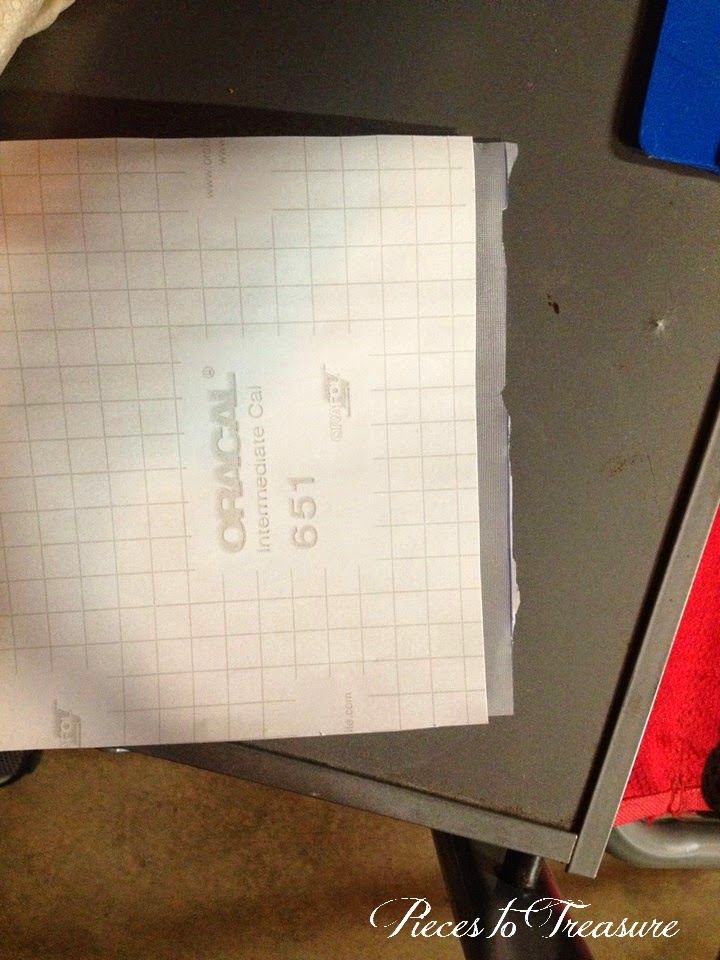
While it was cutting I got out my transfer "paper" and cut a piece to size. For the two layer images I prefer this clear transfer paper. It's more like a plastic than paper, but it's clearer than the paper and I can see what I'm doing SOOOO much better. I order this from Expressions Vinyl in this 6" by 100 yard roll. It's quite inexpensive for the quantity!!!

Once the image is done cutting I like to leave it on the board and weed it. If you've never weeded outdoor vinyl before it can be quite the "sticky" situation! If I leave it on the board the paper doesn't come up and grab the excess vinyl as I'm pulling it off. It's just my little method of keeping it in control.

I then take the piece of transfer tape I cut and lay it over the TOP layer of vinyl. I say that with all caps because I have messed up and done the second layer in a 3 layer project and it was a mess to fix. So start with the top most layer, move that to the second layer and so on. Burnish it so the whole thing is stuck to the transfer tape.

At that point I finally take the first layer off my cutting mat.

Carefully remove the paper backing, but do NOT throw it away. You need it to line this all up correctly.

Lay the paper back over the image only exposing the registration marks. This is going to ensure that you do not stick the image down before your ready.

Line up those pie pieces/registration marks with the next layer. Since this is just a two layer it's fairly simple, but it does take some time to lay it there properly. Also, do NOT rub it down till you know it's lined up properly.

See...they're lined up. It has a bit of space between them due to the knife in Studios, but just get them lined up as close as you can to even.

Ok, I'm going to give you a warning here...see how I pulled that back like that...yeah, it pulled off the registration marks from the paper. That completely defeats the purpose. I had to carefully line them back up with the slight depression the silhouette made in the paper when it cut it. Don't do what I did...it's unwise!!! So be careful when you pull the paper off the back of the image so you don't lift the side you just stuck down!


Since this is a small image it was easier to smooth down on top of the other. If the image is larger be careful to lay the image down slowly from the side and smooth down as you go so as to eliminate the possibility of bubbles between the layers. I didn't see any but if you do get small bubbles you can take a pin and put a small hole in the side and rub them back down. If you keep the hole small enough it shouldn't be seen.

Before putting the bumper sticker on the car those registration marks have to come off. It's easier to take them off now rather than when they're on the car windshield.
Now the bumper sticker is ready to go on the car!!!
At this point I've cleaned my window where I want to apply the bumper sticker. Carefully remove the backing paper then reposition it just over the image leaving a bit of transfer tape to help you line it up on the car where you want it.

Line the image up where you want it and stick that top tape to the window. You may have to hold it there while taking off the backing paper.

Carefully remove the backing paper and slowly apply the bumper sticker from the top down. Once it's down burnish it with a credit card or a blue burnishing tool like I have!!!

Slowly lift off the transfer tape making sure the whole thing is stuck down...

...and there you have it!!!
WOW...that was a lot of pictures and words. If you're still here then awesome...and thank you for "sticking" around!!!
Till next time...and another treasure...
Jennifer